Toronto- Condition open parking spaces for motorcycles often make apes who forgot entrust biker helmet . Because, when it starts to rain , protective headgear it could turn into a water reservoir . Conditions wet , dirty , humid , and smell bad can cause an uneasy feeling every time contact with the skin , certainly very disturbing way.
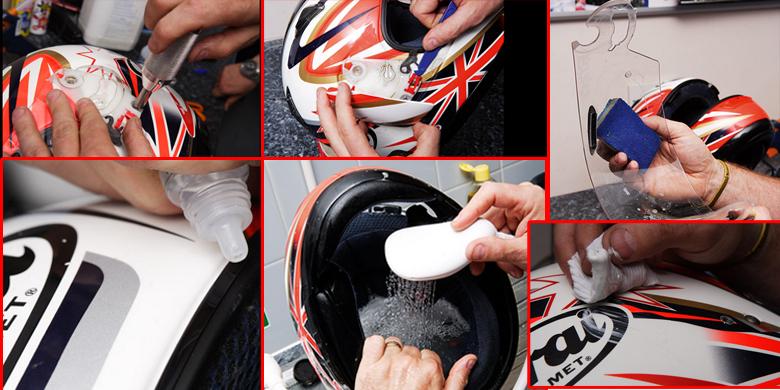
Just as the completeness of other compulsory wear when riding , the helmet is also important to be treated on a regular basis , of course, to avoid the appearance of the musty smell . It's easy, just cleaned with warm water and cleaning fluids . Before cleaning , set up equipment such as toothbrushes , Q-tips , clean cloth , foam , and cleaning products . Following steps .
1 . Most of the parts will be stripped helmet , sure is hard when put back , disposable cell phone photos on the outside and inside for installation reference .
2 . Disassemble all parts of the helmet slowly . Some manufacturers usually include removing components in the manual . If the first did , you should be careful , remove only the easy part . Then put all the pieces neatly for easy reference during installation .
3 . Typically , removable cheek pads . After that , the helmet shell flush with warm water , then wash with the help of a little baby shampoo . Rub gently , then rinse , repeat several times until all the dirt fall out . Do the same thing on the cheek pads .
4 . Drain in a cool helmet . If you want to complete more quickly , it is advisable to use a fan , not air conditioning .
5 . Windshield Wipe with a clean cloth combination with a soft surface ( microfiber ) , warm water and a little soap . Prioritizing put fingers to remove dirt in order to minimize the possibility of blisters . Allow to dry without tool assistance .
6 . To clean the outer surface , if it is dry , use enough water , do not use chemicals because it can erode gloss coating . Use a cotton bud and a toothbrush to clean difficult to reach areas . Repeat all the steps several times until it is completely clean .
7 . Re-assemble the helmet properly . If not sure , use a photo as a reference . No need to rush , make sure everything is installed properly .
No comments:
Post a Comment